“You don’t need perfect vision to have a perfect dream.”
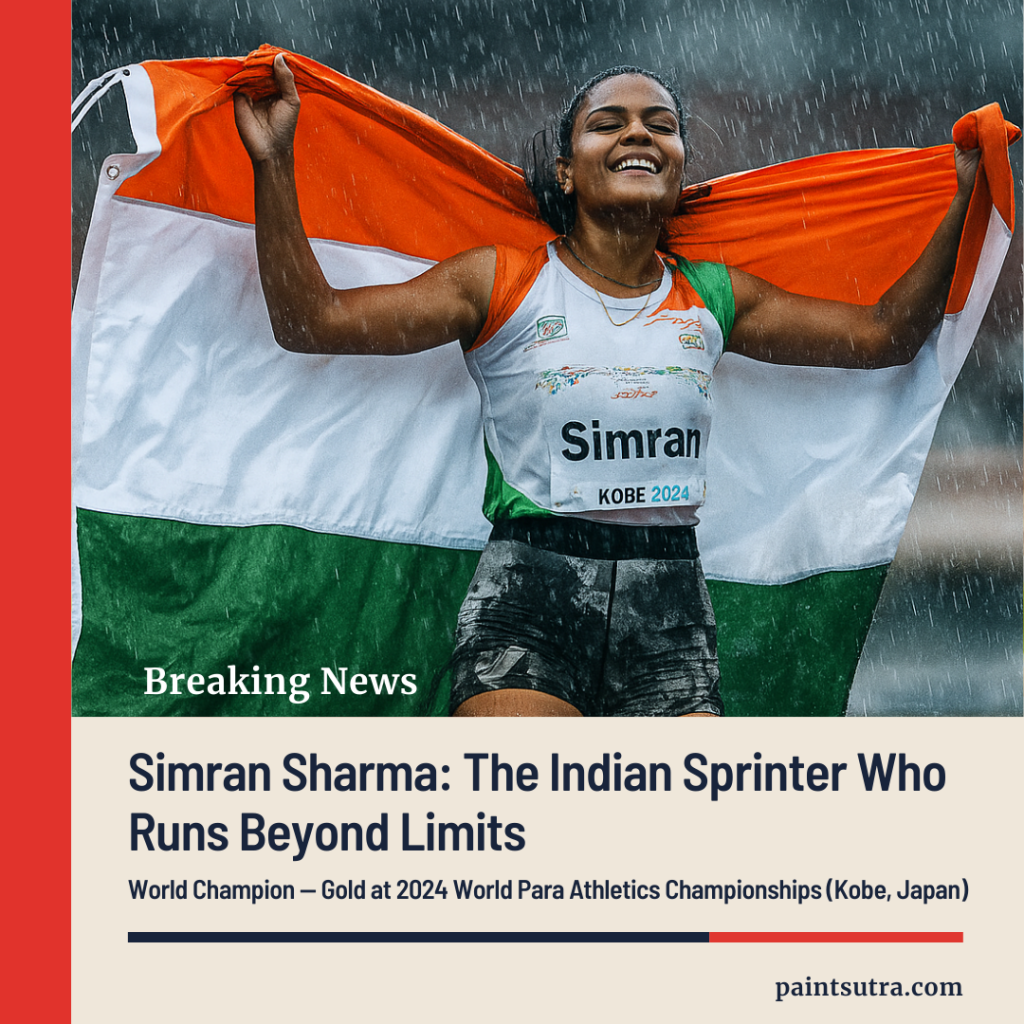
The Journey of an Unstoppable Sprinter
Simran Sharma’s story is the definition of grit and determination. Born with a 40% visual impairment, she could have let life slow her down — but instead, she chose to sprint past every limitation.
From barefoot runs on dusty lanes to standing tall on the Paralympic podium, Simran’s journey is a masterclass in turning adversity into achievement.
Achievements & Awards – Full Career Timeline
| Year | Event / Competition | Discipline & Category | Medal / Award | Performance / Time | Venue |
| 2024 | Paris Paralympic Games | 200m T12 | 🥉 Bronze Medal | 24.75s (PB) | Paris, France |
| 2024 | Paris Paralympic Games | 100m T12 | 4th Place | 12.31s | Paris, France |
| 2024 | World Para Athletics Championships |
200m T12 | 🥇 Gold Medal | 24.95s (PB) | Kobe, Japan |
| 2023 | Asian Para Games (2022 edition) | 100m T12 | 🥈 Silver Medal | 12.68s | Hangzhou, China |
| 2023 | Asian Para Games (2022 edition) | 200m T12 | 🥈 Silver Medal | 26.12s | Hangzhou, China |
| 2023 | Khelo India Para Games | 100m T12 | 🥇 Gold Medal | — | India |
| 2023 | Khelo India Para Games | 200m T12 | 🥇 Gold Medal | — | India |
| 2023 | Khelo India Para Games | Long Jump | 🥇 Gold Medal | India | |
| 2024 | National Sports Awards | — | 🏅 Arjuna Award | India |
A Race Beyond the Track
Simran’s 400m lap in the Paralympics wasn’t just a race — it was the story of her life condensed into 60 seconds. Every stride told the world: “My vision may be limited, but my ambition is boundless.”
Her gold in Kobe cemented her as one of India’s most promising para-athletes, while her bronze in Paris made her a household name.
Why Simran Sharma Inspires Millions
- Barrier Breaker – Proved that disability is not inability.
- Record Setter – Personal bests on the biggest stages.
- Role Model – Inspires young athletes across India to dream big, regardless of challenges.
Simran Sharma’s career is still unfolding, and the world will be watching as she aims for more medals, more records, and more history.
She’s not just running for herself — she’s running for every dreamer who has ever been told “You can’t.”
“Some people don’t just run — they run beyond limits.
Simran Sharma is one such inspiration.
From overcoming visual challenges to winning medals for India, she proves that true colour shines brightest when tested.
At Paint Sutra, we believe in celebrating these shades of courage and determination.
Because whether it’s in life or in design, the right guidance brings out the best in every journey.
Expert guidance – Consult our colour specialists.
📞 Call Paint Sutra: 9700226666, 8336885588″